|
By Jonathan
Gunson & Marten Coombe THE SOLUTION Released January
1st 2002 INDEX
1. Over 30,000 entries. A personal thank you from the authors.
2. Introduction to 'The Solution'
3. The Solution: 'The Alchemist's Spell'.
4. The list of seventy five 'word objects' that 'spell out' the solution.
5. How to solve the puzzle.
6. A more detailed explanation of how the puzzle is solved
7.
Confirming the 'seven solids' role in solving the
puzzle.
8. Details for deciphering the 'seven solids' secret instructions.
9. Two key symbols in the puzzle. Nimue & Merlin.
10. Tricky
'muddlers' hidden throughout the
book.
11. 'The Merlin Mystery' puzzle nearly solved by the
deadline - December 31st
2001.
12. Several entries received with the final 'Peace'
word/symbol on the envelope
13. The Magic of the Alchemist's spell
14. A brief
history of the book
Special thanks to David Flower, webmaster http://www.tintagelweb.co.uk/ for use of the
Tintagel photographs on this website. |
1.
Over 30,000
entries to The Merlin Mystery'
A personal
thank you from the authors.
Welcome to 'The Merlin Mystery'
solution, and a personal thank you to all the puzzlers who took part and
helped to create the magic realm that has surrounded this puzzle for the
past three years. Over 30,000
entries from all parts of the world were received and some very
large groups even worked together across the internet. But while the
puzzlers collectively came within a stone's throw of solving it, no
correct entry was received before the December 31st 2001 deadline.
Our
special thanks to Mr Eddie George, Governor of the Bank of England, for
agreeing to hold the prize and the wand in his bank at Threadneedle Street
in the City of London.
For us the book has been an
adventure of discovery, especially when we were creating the story and
artwork. We would also like to thank all the people who sent us their very
kind communications. It has been a six-year journey from the very first
day to today, and we are delighted to know that we have brought so much
fun to so many people. For now though we would like to take a break from
the 'Mystery', and so this web site is the only 'revealing' discussion we
wish to have regarding the puzzle.
Our very best wishes
to you all for 2002 and beyond.
May the Pendragon
Alchemy be with you
January 1st 2002

2.
Introduction
to 'The Solution'
Copyright
photograph used with permission of www.tintagelweb.co.uk
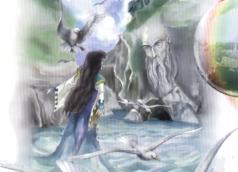
'The Merlin Mystery', by
Jonathan Gunson and Marten Coombe, was published in August 1998 by Harper
Collins UK and translated into seven languages. The book tells of the love
story between the Wizard Merlin and Nimue the Water Sprite, and their
battle with the Dark Wizards for control of the ancient Alchemist's wand.
Hidden in the words and pictures
is the fabled Alchemist's
Spell,
lost for seven centuries. The puzzlers' task was to find the spell and win
Merlin's wand plus all the gold built up since the puzzle quest began.
While many puzzlers came very close to unravelling it, the puzzle was not
finally solved.
Correct solution
required
Entrants had to find
seventy-five 'clue objects' on the panelled page borders of the book,
which when put into the correct order would 'spell out' the solution to
the puzzle. (Some of these 'clue objects' are actually blanks to create
spaces between parts of the solution.) These clues are also largely visual
so they can be understood easily as 'idea-concepts' or 'word-concepts'.
This way the English language is not required for solving the puzzle.
The list of clues is further
on in this explanation.
The solution comprises two
parts: The Spell, and its Method of casting. The rules required that these
had to be drawn as two separate elements. This was also to indicate the
mostly visual nature of the solution. (Words could also be used, as long
as the main elements were drawn in
the two parts.)
The Spell is largely a
single, beautiful, physical circular shape. Its form and content is
described by the first section of the visual list of the seventy-five clue
objects.
Entrants were required to draw this form.
The same applies to the second part of the spell, the 'Method of casting' which also has a circular element. The last word of this part of the solution had to be drawn or sketched, the symbol word 'Peace'. (The rules also required this symbol to be drawn on the entry envelope.)
Only entries that
followed the rules and clearly displayed the solution were acceptable.
The prize
The prize, which
accumulated to seventy-five thousand pounds, will be donated to the
British World Wide Fund For Nature. The wand
will be auctioned, and the proceeds also presented to the UK WWF.

Bookmark this page and watch
for notice of the
Merlin Wand Auction date!
3.
The
Solution:
The
'Alchemist's Spell'
The magic
rune-pentacle
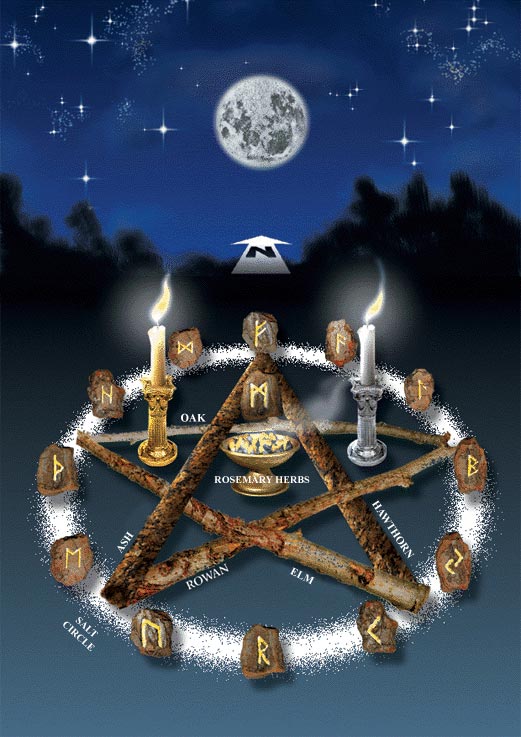
Note: This image
contains the correct alignment of wood names as held by the authors for
checking any solutions received.
Words and actions for
casting the spell:
(Also known as the 'method of casting' )
Call out the runes:
"Ansuz, Laguz, Berkana,
Jera, Kano,
Raido, Uruz, Ehwaz,
Thurisaz, Hagalaz, Dagaz, Fehu".
Call out the rune:
"Mannaz"
Extinguish the silver candle.
Extinguish the gold candle.
Say:
"Peace."

The Alchemist's Spell is a mystical
combination of words, actions, and an ancient, circular, supernatural
rune-pentacle, constructed of beautiful, magical materials. The pentacle
is arranged facing north and its spell power is released with a sequence
of actions and spell words, cast during the time of a full moon. The spell
must be laid out with the pentacle of five-woods, salt circle, candles,
runes, burner-with-coals, and Rosemary herbs all in the correct positions.
Note 1: Both the 'Pentacle', and the 'Words / Actions' form parts of the spell. the full moon.
Note 2: The Alchemist's Spell is intended to be expressed entirely as language-independent imagery and symbols. For example the runes in the 'casting' can be sketched out as symbols. Drawings can be made of all the other components such as the candles being extinguished. (Even very rough sketches would have been acceptable to the judges.) However it is displayed here mostly as an image, with the names of the five woods, salt circle, Rosemary herbs, casting words and actions in English so that web site viewers can immediately appreciate these details.. the full moon.
Note 3: The 'Philosophers' Stone' is the full moon. the full moon.
Re 'The Merlin Mystery' entry rules and conditions:
The rules required
puzzlers to provide an explanation of their method for arriving at these
clues and the solution.
No correspondence can be
entered into regarding the puzzle and its solution.
4.
List of the
seventy five 'word objects'
that 'spell
out' the solution
Here is the list of seventy-five 'word objects' puzzlers needed to find and put in the correct order. The list 'spells out' how to construct the magic circle and the casting actions and words that accompany it. All these objects are in the pages of 'The Merlin Mystery'.
1. Full Moon
(Image of full moon)
2. (Blank)
3. Pointing
(Hand
points)
4. North (Compass with North in
gold)
5. III (Roman numeral III)
6. Foot (Ballet foot) (length of your
foot)
7. Salt (Salt pouring)
8. Circle
(Circle)
9. Orbits (Diagram of a path round a
sphere)
10. Wood (Piece of wood)
11. Star
(5 pointed diffuse glowing star)
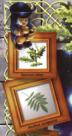
12. Oak (Quercus) (Framed watercolour
picture)
13. Ash (Fraxinus excelsior) (Framed watercolour
picture)
14. Rowan (Sorbus acuparia) (Framed watercolour
picture)
15. Hawthorn (Crataegus monogyna) (Framed watercolour picture)
16. Elm (Ulmus procera) (Framed watercolour
picture)
Note: 8-16 makes up the salt and wood
pentacle. The angle / tilt of the frames around the picture of each type
of wood shows how they make up the pentacle.
17. (Blank)
18. Salt (Salt pouring)
19. Circle (Circle)
20. Clockwise (Owl clock)
21. Runes (Pic of rune book page with 24
runes.)
22. III (Ansuz Rune) 3
23. XX (Laguz Rune) 20
24. XVII (Berkana Rune) 17
25. XI (Jera Rune) 11
26. V (Kano Rune) 5
27. IV (Raido Rune) 4
28. I (Uruz Rune) 1
29. XVIII (Ehwaz Rune) 18
30. II (Thurisaz Rune) 2
31. VIII (Hagalaz Rune) 8
32. XXIII (Dagaz Rune) 23
33. XXIV (Fehu Rune) 24
34. (Blank)
35 North (Compass with north in
gold)
36. Triangle
(Triangle)
37. Rune
(Rune book)
38. XIX
(Mannaz Rune) 19
39.
(Blank)
40. Left
(Left
hand)
41. Triangle
(Triangle)
42. Burning (Flames)
43. Gold
(Gold
ingot)
44. Candle
(Unlit
candle)
45. Right (Right hand)
46. Triangle
(Triangle)
47. Burning (Flames)
48. Silver (Silver ingot)
49. Candle
(Unlit candle)
50. (Blank)
51. Star (Diffuse five pointed
star)
52. Heart
(Heart made of
silver)
53. Censer of hot coals
(Pic)
54. Burn (Flames)
55. Rosemary (Framed watercolour
picture)
56. (Blank)
57. Say
(Town
crier)
58. 12
(Stone tablet with 12
cuts)
59. Runes
(Book of runes)
60 Clockwise (Owl clock)
61. Say
(Town
crier)
62. Mannaz Rune (Pic)
63. (Blank)
64. Silver
(Silver
ingot)
65. Candle (Unlit candle)
66. Extinguish (Snuffer)
67. Gold
(Gold
ingot)
68. Candle (Unlit candle)
69. Extinguish (Snuffer)
70. Say
(Town
crier)
71. Circle (Circle)
72. Orbits
(Diagram of a moon path round a sphere)
73. Rune
(Rune book)
74. XIV
(Algiz rune)
75. Upside down- ('Knife turns upside down'
box)
Note:
71,72,73,74,75 is a mini-brainteaser, the answer to which is a 'peace'
symbol Ò the final 'word' of the spell.
5.
How
to solve the puzzle
The Merlin Mystery contains over a thousand clues. All parts of the story and virtually every object and image in the book have at least some bearing on the puzzle. However, an encyclopaedia of information would be needed to explain it all, so instead outlined here is simply the method for identifying seventy-five 'objects' on the panelled page borders and how they are used to 'spell out' the Alchemist's Spell solution.
The master secret is
to draw lines in THREE DIMENSIONS through the book to locate objects that
'spell out' the spell.
Puzzlers discovered early on that the pages had a clockwise Zodiac running around the borders. To arrive at the solution, puzzlers had to go clockwise around several of the zodiac border panels on each page, drawing a line from each zodiac panel, and continue each line onto ANOTHER page across a gold alchemy symbol, hit a border panel on ANOTHER page, then move clockwise or anticlockwise around the border panels until arriving at ANOTHER final panel.
Puzzlers had to do this
for all pages in the book and collect up all the objects found on these
final panels. They then had to put them in a special order. When the objects are viewed in this
sequence as 'word concepts' they 'spell out' the Alchemist's Spell.
Seven
sub-puzzles reveal the pathway through the puzzle.
The
SEVEN 'SOLIDS'
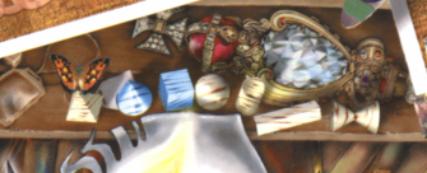
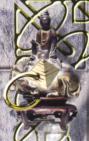
Seven distinctive wooden 'solids' can be found on the library shelf beside the royal sceptre Ò on the 'floating cat / library' double page. These seven 'solids' represent sub-puzzles or tumblers which unlock the various stages of the puzzle, which when followed in sequence will take the puzzler right through the entire puzzle to the solution. They provide a guide for drawing the 3D lines through the book including which pages to turn to, which gold alchemy symbols to use, and reveal many other vital facets of the puzzle.
The purpose of each solid shape is made clear by each being linked (indirectly) with a gold ring to an object that identifies its purpose. Each solid or shape is a puzzle. So the meaning of each solid in the sequence has to be deciphered. When solved, each gives an indication of the next step in the master puzzle to take. The solids also appear throughout the book and are designed to be incongruous and 'mysterious' in their location and so clearly of some importance to the puzzle.
The
meanings of the 'solids':
Pyramid represents the zodiac, cone represents order of alchemy symbols, cube represents the process for finding the page location of the alchemy symbols, sphere represents the page location of the target panels, tube represents the location on the page (clockwise or anticlockwise) of the final 'word object' target panel, oblong represents the word number in the spell the target word object is, and finally, diabolo represents 'turn the page' from the page where you began, and start the sequence again.
Puzzlers understood this almost from day one. A large number discovered this 3D 'up and down' the book process using the 'seven solids'. But the 'draw-a-line in 3D' principle did not occur to them.
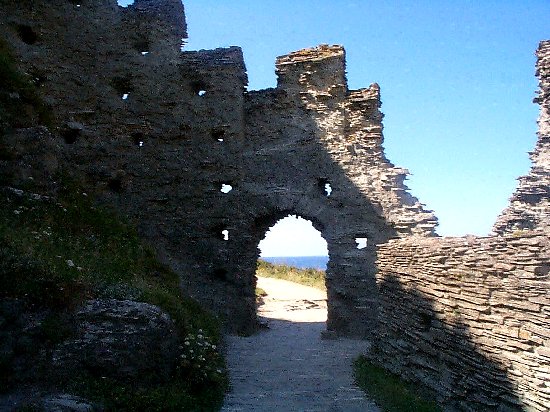
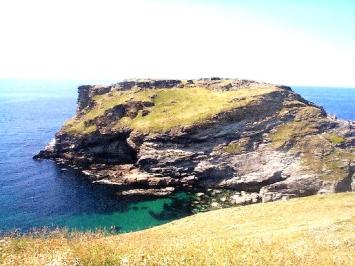
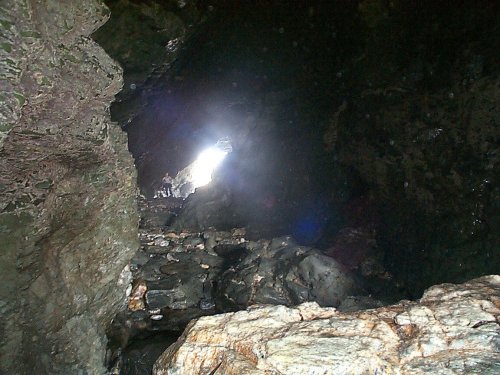
6.
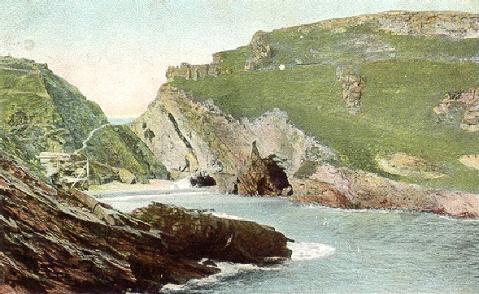
Tintagel
Castle, Cornwall.
Merlin's
cave can be seen at the end of the beach
Copyright
photograph used with permission of www.tintagelweb.co.uk
A
more detailed explanation of
how
the puzzle is solved
Seven
'solids' show the puzzler how to move through the book. These 'solids'
also set the path for drawing three-dimensional lines to find 'word
objects' that 'spell out' the solution
Puzzlers had to conclude they needed to draw 3D lines through the book. The 'seven solids' sequence guides the pathway for these lines.
While
studying the detail of the illustrations and borders in the book, puzzlers
could recognise that since the puzzle could be solved by anyone speaking
any language, the answer to finding the spell might lie in a system that
picked out visual objects either on the borders or in the pictures - or in
both. These objects, when put in some sort of order would 'spell out' or
reveal the alchemist's spell. (A classic form of 'symbol' language
puzzle.) In fact this is exactly how the puzzle does work. The task for
puzzlers lay in deciphering whatever system there might be to do
this.
The
system for guiding puzzlers through the book, and knowing which page to
turn to when drawing lines in three dimensions, is indicated by the line
of 'seven solids' on the library pages bookshelf. These 'solids' represent sub-puzzles or
tumblers, which when followed in sequence will take the puzzler right
through the entire puzzle to the solution.
The 'seven solids' mostly had fully confirmed 'instructions', and there are even light clues indicating that 'lines' should be drawn from one panel to another - and in 3D. This is the main secret of the puzzle, and is the part that puzzlers mostly had to figure out for themselves.
However, to at least give puzzlers a start,
there are clues that do hint at and 'point' towards the idea. For example,
the entire story with its images is specifically designed to indicate the
three dimensional nature of the puzzle. For example, in the story the cat
and owl race in a 'line' from one room to another, plunge down through
floors or levels in the cottage, then end back 'upstairs' again.
There are also many other hints:
The
library illustration is intended to also strongly suggest the three
dimensional nature of the puzzle - the black cat floats up into the air,
and a book floats with its pages spread open. The magnifying glass and
dividers provide a gentle hint to 'focus' on connecting one point with
another with a line. A tall pile of books towers upwards in three
dimensions, and books on shelving also hint at 'layers'. There is even a
little calculator sitting on a pile of loose paper suggesting calculate
'pages'. The 3D wooden wall pillars in the library come right out of the
page and plunge deep into the library image, with shadows falling on the
panels to further hint at this.
Other
hints include the inkpot with quill and tumbling pages, which is meant to
suggest 'draw from page to page'. And there is a geometry 'drawing' book
at the top of the page with pages falling from it into the three
dimensional library hinting at 'draw' in 3D through the pages. There is a
ruler sitting beside a book with a bookmark in it, to jointly hint at
ruling lines on a page. In association with this, bookmarks sit in pages
all the way down the huge pile of books with Merlin's hat on it. The top
red book in particular has several bookmarks in it meaning 'use several
pages'. The collective idea suggests ruling lines through the book pages
in 3D. Also, a broom handle can be found on the library 'text' page. The
broom forms a short line from one panel to another panel. This broom is
found again, but in 3D perspective on the main library pages and it also
starts from a panel, but the other end descends into the library image.
These two images are intended to suggest taking a three dimensional
approach with making lines between panels 'into the book'. The Royal
sceptre seen with the seven solids in the library shelf (the three
dimensional instructions solved by the puzzlers) is also found on the
previous spread associated with scrolls of paper pointing in an outward
angled direction from a border panel into the pages. (Indicates aim a line
and follow the seven solids through the book in 3D starting from panel
points.)
Another
hint is the Knight holding a long jousting lance on the 'playroom' page.
The lance traverses the page to touch on a border panel, and is designed
to suggest taking a line across the page to a far border panel. Another
Knight on the same page is linked to the child's 3D seven solids slider
puzzle (The slider directs puzzlers to go through the seven part solving
sequence in 3D). The very same knight also is found linked to the 'seven
solids sequence' book on the 'cave' text page. The link between the 'lance
knight', and the other two knights with slider puzzle and solids book is
collectively designed to suggest 'draw lines from panel to panel in three
dimensions'.
On the
same 'playroom' page the Zodiac and Alchemy Beefeaters have zodiac and
alchemy 'lance' clocks. On a panel between them is a 'green door' -
suggesting go straight through the book borders from the Zodiac on one
page through Alchemy on another page, and to the final 'tiles' system on
another page. (The tiles are represented by the beefeaters.)
On the
ballroom page border, a Fokker tri-plane shoots a 'line' of tracer fire
from one panel to a Spitfire on another panel.
As it
turned out, within a few months of the book being published, several of
the puzzlers surmised that since the method for solving the puzzle was
language independent, then drawing lines from point-to-point to locate
'visual symbols' might be the way to solve it.
The 'Zodiac' border panels Ò starting points for the three dimensional lines.
The
borders are split into forty-eight identical panels. On every fourth panel
is one of the twelve signs of the zodiac, which runs clockwise around the
page. We shall call these 'Zodiac' panels. The first sign, Aries, begins
on the second panel to the top right of the book's gutter Ò at the one
o'clock position.
Puzzlers will now see that each of the
'objects' to be found is located by a moving sequentially around the
'zodiac' panelled borders of the book in a similar way to many classic
board games.
Once the seven sub-puzzles are solved, puzzlers can work logically through the book
The process applies three dimensionally as follows: Puzzlers go logically through the entire book spread by spread, drawing lines from zodiac panels through the book, locating objects, then going back to where they were and turning to the next page until all double page spreads have been done. Apart from the first double page and the last, each sequential double page is a starting point, with either three or four Zodiac panels to draw lines from. The number of zodiacs to use is dictated by the number of witch hats on the page.
I.e. The zodiac panels, alchemy symbols and 'word object' panels are not on the same page, but on three different pages. Let's call these pages X, Y, Z.
1. On page X the puzzler starts drawing a line from a zodiac panel.
2. The puzzler now turns to page Y to find an alchemy symbol, continues the line across the alchemy symbol and out to a border panel.
3. The puzzler now turns to page Z and locates the same panel.
4. The puzzler then goes clockwise or anticlockwise around the border to locate the real panel with the 'word object' on it.
5. These 'word objects'
then need to be put into correct order. This order is provided by the
trail of square copper tiles with coded symbols that can be seen around
the sides and bottom of each page. These give each 'word object' an
ordering number. (Deciphering the tiles is explained further on.) Once all
the word objects from all the pages in the book are put into this order,
the alchemist's spell, and how it is cast, is revealed.
An action example of how the 'seven
solids' information directs the three-dimensional 'line
drawing':
Starting on a
page in its sequential order, set three or four trajectory lines starting
from each of the three or four zodiac points. (The number of witch's hats
will tell you whether to use three [or four] zodiac symbols.)
Now calculate
the gold and silver sublimate of sulphur symbols which will tell you which
double page spread to go to next. On the spread you arrive at, continue
the lines respectively across the three or four alchemy symbols there and
on out towards the border panels. (You will need to have solved the
spitfire puzzle in order to have the correct symbol order.)
Now count the
silver and gold cadency symbols on that page which will tell you to go to
yet another spread and go to the same panels there.
These panels are
still not the correct ones. The final panels on which the correct
'word objects are to be found are several panels clockwise or
anticlockwise. This is indicated by the sum of the number of clockwise and
anticlockwise moons found on the pages. Go around the border clockwise or
anti clockwise to establish the final correct panels. The correct 'word
objects' are located on these panels.)
Each of these
'word objects' is now valid, but when all these objects from throughout
the book are laid out they are still not in their correct
order. To find the correct order, the symboled 'copper tiles' code
on each page when deciphered provides the correct order numbers for the
'word objects' found on each page, working anticlockwise. Number these
clockwise starting with one o'clock as the earliest
point.
Once all the
tiles codes are applied to the word objects and they are put into 'tile
numbered' order the Alchemist's Spell solution is
revealed.
7.
Confirming
the 'seven solids' role in
solving
the puzzle.
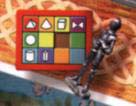
Solid connection:
The child's slider puzzle-box confirms the
sequence of how the
'solids' work in three- dimensional page
levels.
How to use these 'solids' in the correct way is confirmed by the 'solids' slider puzzle-box which is found on the 'playroom' page. (It sits beside a silver knight.) This puzzle box shows and confirms how to use the solids system through the book. In the box there are colours and levels. Puzzlers follow the solids via the rainbow colour order and are shown to move a level in 3D, through the pages in the book, by the 'seven solids'. Coloured panels on the box without any of the 7 solids are irrelevant. There is even a spare space in the box puzzle to indicate 'move the cube information to its correct page'.
The coloured tiles in the puzzle box follow the colour sequence confirmed by the rainbow to the left of the page. I.e.Red, orange, yellow, green, blue, indigo, purple. There are also levels in the puzzle box showing how much to do at each page level. I.e.Pyramid, cone and cube all need to be solved on the first page. Then the ball puzzle is done on the next page turned to, then the cylinder puzzle and oblong puzzle on the next page turned to.
After that the diabolo solid comes into play because it is on a purple tile, but it is back at the 'beginning' level. This means go back to the page you started from. The diabolo means 'turn to the next page' from there. Then the whole wooden solid sequence is gone through again, until all the pages in the book are completed in an orderly sequence.
Child's slider puzzle-box. Level one. (Page X):
1. Pyramid - Red panel: Start with the zodiac (Page X)
2. Blue Cone - Orange panel: Unravel the alchemy symbols correct order. (This is the 'spitfire' sub-puzzle that reveals this - see explanation further on.)
3. Blue Cube - Yellow panel: Calculate which page (page Y) the alchemy symbols are on from the gold and silver sublimate of sulphur symbols on this page (X) and turn to it. (pageY)
Child's slider puzzle-box. Level two. (Page Y):
4. Sphere - Green panel: On the current page (pageY) calculate on which page the target panel really lies. (PageZ) by using the gold and silver cadency symbols
Child's slider
puzzle-box. Level three. (Page Z):
5. Cylinder - Blue panel: Use the 'moons' to calculate how far to go clockwise or anticlockwise to find the correct panel
6. Oblong - Indigo panel: Put the word objects into the correct order. The copper tiles give the word object ordering numbers for this. (The 'Heraldic shields / numbering tiles' sub-puzzle reveals this - see explanation further on.)
Child's slider
puzzle-box. Back at level one (Page X) I.e.back to page you were
at:
7. Diabolo - Violet panel: Go back to the page from which you started this last sequence, and turn to the next double page spread.
Another wooden 'solid' sequence confirmer.
A key confirmer of the importance of the solid solids is the book that can be seen on the cave text page (bottom left) with stripes of colour the same as the wooden solids. This is to indicate puzzler should do all seven actions starting from the original page each time, then go back to where you were and turn the page.
Note: The child's box puzzle and the 'stripes' book both have a knight in silver armour close by to show they are related.
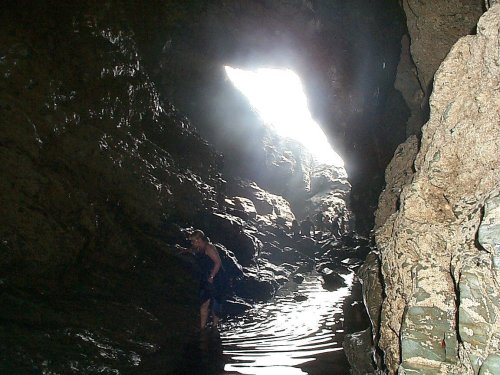
Inside Merlin's cave at Tintagel, Cornwall.
Copyright photograph used with permission of www.tintagelweb.co.uk
8.
Details
for deciphering the
'seven
solids' secret instructions.

Tintagel Castle Doorway
Copyright photograph used with permission of www.tintagelweb.co.uk
STEP ONE:
THE PYRAMID WOODEN 'SOLID'
(Zodiac
puzzle)
INDICATES:
START
FROM THE ZODIAC PANELS
The key principle of the puzzle is to draw lines starting from the
'zodiac' border panels one by one clockwise.
Note: This initial sub-puzzle was
solved within one month of the puzzle start date!
'Solid' connection:
The 'pyramid' wooden solid is
linked with a gold ring to a Chinese incense burner on the alchemy lab
page. This incense burner is in turn linked to a book featuring two
Nimue or 'master Zodiac' symbols on the Stonehenge text
page. So the pyramid means 'Zodiac'.
Further confirmation of this: The twin Zodiac symbols in this book also visually match the twin symbols on the wings of the butterfly seen on the zodiac start point, the Aries border panel. (Library illustration page.) The same 'Zodiac butterfly' also sits on the pyramid solid on the library shelf, further indicating that this solid means 'Zodiac'. So overall the wooden pyramid solid not only means 'start' with the Zodiac, but also start 'at this exact border panel'.
Here's how to find the hidden zodiac panels: The zodiac runs clockwise around the border. (Usually the zodiac runs anticlockwise.) This is confirmed by the partially disguised zodiac symbols scattered through the book, (of which there are only a few, but sufficient to indicate.) These are located in the correct clockwise positions. e.g. the Virgo symbol is disguised as a piece of blue jigsaw puzzle at the bottom right on the cave text page.
Which Zodiac panel to
start with.
The zodiac starts at the one o'clock position. This is indicated by the location of the Aries symbol on the one o'clock panel (see the Stonehenge page), and also a clock set at one o'clock on the following page on the same panel. There is a confirming link between the two to verify this: Both the clock and Aries symbol have the same Roman wreathed marble sculpted head attached to them. There are many other confirmers of the one o'clock zodiac start point through the book all of which can be easily found.


How many Zodiac symbols to use.
The number of zodiac symbols to use on each page is directly regulated by the red-banded witch hats found on the pages. (e.g. 'Three witch hats' indicates use three zodiac symbols.) The confirmer for this is the 'witch clock' found on the Stonehenge text page, bottom right.

This has a witch hat in its sky panel, and the dial has a red ring indicating one hour. (The minute hand has a red tip to indicate that the red ring circuit of the clock face equals sixty minutes.) This means that the witch hats found in the pages with red bands each indicate 'one hour' - or one zodiac symbol. The link between this 'witch' clock and the zodiac is made in several ways: Nimue is referred to as a witch in the story, and in the clock sky panel can be seen a witch's hat. We also already know she represents the zodiac as mentioned before, and her symbol is seen barely disguised in parts on the clock face. The witch hat is also seen in the zodiac clock on the left hand side of the transformation page, and underneath, the same zodiac and clock wheel are enlarged behind her on the page.
Note:
Puzzlers discovered the 'witch hats' connection during the first year of
the puzzle.
Another
confirmer: Nimue holds a symbol floating in front of her on the
'transformation' pages. In the sky behind her is a zodiac ring. A great
clock also fills the sky behind her - once again meaning
clockwise.
A special confuser designed to trip up puzzlers is that the zodiac pages start on the second double page spread (the library scene) not the first, and end on the second to last double page spread. (The wand dissolution page.) This is indicated by there being no Nimue symbols or red-banded witch hats on the first double page spread or the last.
Overall the 'zodiac' principle is to go through the book, shooting out lines, going round and round the zodiac, Assuming the title page is page 1, start at Aries on page 4/5. On that spread there are 3 witch hats, so go round 3 zodiac points. On the next spread 6/7 count the number of witch hats, and go round that number of zodiac points, and so on through the book. Also a Nimue symbol is very relevant on each page, as puzzlers will discover.
Once an entire 7-step sequence has been completed and then puzzlers have gone back and turned to the next double page, they continue round the clock using the zodiac panels. e.g. Aries is on the one o'clock panel on the first (library) double page spread, so a Nimue symbol sits just outside that panel. On the next double-page spread the fourth zodiac symbol around is the start point, and so on through the book.
________________________________________________________________________
The next two symbols - a cone and a cube - are both coloured blue to indicate they work together: They both make use of the 'alchemist's key' symbol. This symbol is seen in many places through the book, its main presence being on the cover of Merlin's spell book.
___________________________________________________________________________
STEP TWO:
BLUE CONE WOODEN 'SOLID'
(Spitfire
puzzle)
INDICATES ALCHEMY
SYMBOLS ARE TO BE USED AT THIS POINT, AND REVEALS THEIR SECRET CORRECT
ORDER.
Note: This is the most complex
sub-puzzle, and we were certain this would take at least 18 months to
solve, but puzzlers cracked it inside a year. It was humbling to see the
light of revelation flood into our laboriously constructed labyrinth so
quickly.
'Solid' connection:
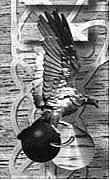
The 'cone' solid is linked with a
gold ring to a gilded eagle at the top left of the 'playroom' text page.
The gilded eagle is in turn linked with a gold ring to a picture of a
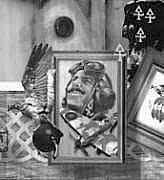
pilot with a Spitfire at the bottom right corner of the 'playroom' page.
Note: The pilot has an alchemist's key on his
collar.
The cone represents the next step: When drawing lines from the zodiac across the alchemy symbols, the question arises: "Which alchemy symbols are used and in which order?" So we need to establish the correct hierarchy.
The secret to this lies in that we know the alchemist's key controls all the alchemy symbols. It is the 'master of all the alchemy symbols' as stated on the wand description page:
The order can be determined from the photograph of the alchemy symbol charm bracelet described on the 'wand description' double page. But the symbol order seen in the photograph is not the final order to use, as this would be too direct an answer!
The correct hierarchy is determined by using the photograph in conjunction with a 'Spitfire puzzle', starting with the picture of a WW2 RAF pilot on the playroom illustration page. (The 'blue cone' link.) The picture of a pilot - on the toy room page - has a sublimate of sulphur symbol on his collar. As we know, this symbol represents all the alchemy symbols, so the spitfire pilot by association has to do with deciphering this.
Beside the pilot is a 4 bladed Spitfire. There are twelve four bladed Spitfires through the book and these are the ones to use. (The rest have three blades and are dummies.) The discovery of this will help puzzlers confirm they on the right track. The process is to spot that all the Spitfires in the book have special red and black markings. (Very obvious)
The idea is to count the markings on the relevant twelve and record these numbers. These 'Spitfire' numbers, in the order found in the book, are applied to the 12 alchemy symbols in the photograph. This will give the new correct hierarchy for the alchemy symbols. Puzzlers will then know in which order to draw lines across the alchemy symbols and on out to target panels.
A further confirmer showing that the Spitfires indicate the alchemy symbols hierarchy order is that one of the Spitfires in the book has gold alchemy symbols on its wings. I also had fun remembering that a 'Merlin' engine powers a Spitfire. (The Alchemist's key is also Merlin's symbol.)
The association of the SOS symbol is also hinted at by the 'Alchemist's Key' symbols which tumble into the picture of the pilot.
Essential explanation:
Look at the photograph of alchemy symbols on the 'wand' page. Take the numbers you got from the 12 (four propeller) spitfires as you worked through the book page by page i.e. number of swastikas (or in some versions of the book, black diamonds) on each and apply these numbers to the symbols. This gives the correct order. The puzzlers took less than a year to crack this... an extraordinary achievement.
Note: There are many other symbols in the illustrations which look like alchemy symbols, but these are meaningless. Only the ones attached to the wand have any effect.
STEP THREE.
BLUE CUBE WOODEN 'SOLID'
(Merlin symbol
puzzle)
SHOWS THAT THE
ALCHEMY SYMBOLS ARE ON A DIFFERENT PAGE
Note: Puzzlers sorted this one out
within six months of the puzzle beginning.
'Solid' connection:
The cube is linked with a gold ring to a red Fokker tri-plane. The Fokker tri-plane in turn is linked by a gold ring to a small gold and silver 'alchemist's key' book.

The blue wooden cube indicates the next step. I.e.Find the correct page of alchemy symbols (across which lines are to be drawn to the far border panels.) These alchemy symbols are in fact not on the same page as the zodiac symbols. The secret to this part of the puzzle (the same as the blue cone stage) lies in that the Alchemist's key is the 'master of all the alchemy symbols' as stated on the wand description page. Therefore the alchemist's key controls all the symbols.
The correct page is determined by looking at the number of "alchemist's key" symbols on the page. Some are silver, and some are gold. The idea is to count them up, then subtract the number of silver ones from the gold ones. (Or gold from silver depending on which there is most of.) This resulting number (e.g. 6 silver) is used to determine how many pages to the left or right to turn to reach the page where the correct alchemy symbols are.
This is confirmed by an open book (bottom right of the library page.) with a silver alchemist's key on the left, and a gold alchemist's key on the right. The page corners are turned up at the bottom corners, left and right, indicating "turn". e.g. 6 silver 'alchemist's key' symbols indicates turn 6 pages to the left.
STEP FOUR:
WOODEN BALL 'SOLID'
(Cadency
puzzle)
TARGET PANELS ON A
DIFFERENT PAGE AGAIN
Note: Puzzlers solved this
'Cadency' puzzle approximately one month after breaking the
joint blue cone / blue cube
"Alchemist's Key '/ Spitfire" puzzles.
'Solid' connection:
The ball solid is linked by a gold ring to a telescope.
The telescope in turn is linked by a gold ring to a gold and silver heraldic cadency book.
Once the lines have been drawn across the alchemy symbols from the zodiac start point, the lines will hit target panels, but in fact the target panels are on yet a different page again to the alchemy symbols, so the puzzle really is "three-dimensional" in a sense. So the next step is finding the correct page for the 'target panels'. This is calculated by counting the silver and gold cadency symbols on each page.
Cadency is an ancient heraldic symbol system to establish the male hierarchy within a family. (Father, first son, second son etc.) This is indicated by a set of heraldic symbols. To be fair to readers who may not have been aware of this symbol system, a series of books with a coat of arms appears through the book on the borders. I used my old school coat of arms for this!
These reveal the hierarchy of the symbols, by being placed through the book in the correct order. e.g. 'Father' is a special symbol shaped like a capital 'E' lying face down, and is the first of the coats of arms books, and can be seen on the top left border of the 'library' scene.
So the process is to assign each of the cadency symbols its correct number in the cadency hierarchy, then find all the cadency symbols on each page. Then add up all the silver hierarchy numbers, and then add up all the gold hierarchy numbers. Now subtract the silver total from the gold total. (Or gold from silver, depending on which adds up to the most.) This resulting number (e.g. 4 gold) is used to determine how many pages to the left or right to turn to reach the page where the correct 'target panels' are.
A special open book with a silver and gold 'Father' cadency symbol confirms this. It is gold on the left, and silver on the right. (This book is at the top-left of the 'Stonehenge' text page.) The book page corners are turned up at the bottom corners, left and right, indicating 'turn'. (e.g. 4 gold cadency symbols indicate turn 4 pages to the left.) This 'cadency' book has 48 panels around the edge, further confirming the association of the cadency symbols and the 48 border panels.
STEP FIVE.
WOODEN CYLINDER 'SOLID':
(Moons
puzzle)
PANELS FURTHER
CLOCKWISE / ANTICLOCKWISE
Note: Puzzlers did crack this puzzle. It was
correctly suggested that the 'moons' mean move clockwise /
anticlockwise around the panels on a puzzler's web site bulletin board
in mid - 2001, but was not able to be applied, because the main '3D line'
principle had not been considered.
'Solid' connection:
The cylinder solid is linked with a
gold ring to a special knife (See bottom left in the Merlin and Nimue cave
page.) The knife in turn is seen linked by a gold ring to an open book
with a crescent moon in a starlit sky.
The same Owl also holds the knife
in its claws at the bottom left of the toy room illustration page. The
knife is also seen with the two owls sitting side by side on its handle in
the 'Crypt' page. The same Owl through the book also sits on crescent
moons, with his eyes indicating left crescent or right
crescent.


The wooden cylinder stage involves finding the correct panels, because the 3 or 4 panels hit are not yet the correct ones. They are further clockwise or anticlockwise around the border.
The crescent moons indicate how many panels clockwise or anticlockwise to go to find the correct panel with the clue object on it.
The correct panels are several panels clockwise or anticlockwise further around the border. This is calculated by counting the crescent moons on each page. Some are clockwise facing, and some are anticlockwise. Count up the crescent moons, and subtract the number of clockwise ones from the anticlockwise ones. (Or anticlockwise from clockwise depending on which there is the most of.) This resulting number is used to count around the panels in a clockwise or anticlockwise direction. The panel arrived at will be the spell "word object to be recorded. There are three or four objects on each page.
The idea is to add up the clockwise and anticlockwise moons, find the balance and apply it. e.g. 6 anti clockwise moons and 4 clockwise moons means go anticlockwise 2 panels round the 48-panel border.
The tube is gold-ring-linked to the knife and in turn the knife is gold-ring-linked to the moon book. The knife handle also has owls on it looking left and right which indicate the clockwise anticlockwise nature of the clue. There is also an owl clutching the knife blade, looking upwards.
Confirmer
Confirmer that the crescent moons indicate to go around the border panels clockwise or anticlockwise: There is an owl clock with an arrow on the dial clearly indicating clockwise. There are also 48 sections around its bezel - which is the number of panels on each page. (This owl clock can be seen on the first double-page, bottom right border.)

These 48 sections form the association with the border panels. The same Owl can also be found on the library page in the same place, his eyes facing to the left. The crescent moon he is sitting on is facing clockwise. Another picture of the same owl may then be found, but he is looking to the right, (Bottom left of the ballroom double-page) and the crescent moon he is sitting on is facing anticlockwise.
STEP SIX:
WOODEN OBLONG 'SOLID'
(Heraldic shields /
numbering tiles puzzle)
SPELL WORD OBJECTS
NEED TO BE PUT INTO THE CORRECT ORDER
'Solid' connection:
Wooden oblong linked to 'copper tiles': A Beefeater holds the wooden oblong. (Crypt text page.) Exactly the same Beefeater holds a blank copper tile on another page. (Marigolds text page.) Two other Beefeaters hold banner (tile) clocks.
Note: A 'muddler' features here - the
beefeater and oblong solid are not linked with a gold ring - unlike the
other six solids. However, this makes not the slightest difference and was
put in to 'muddle'. But from what we saw on the web sites and bulletin
boards, it didn't fool the puzzlers at all!
When all the objects in the book have been collected, they will still not be in the correct order, and so the spell still cannot be read. The correct order is found as follows: Each object has been assigned a number that gives its correct order. These numbers are revealed by the small square copper tiles scattered around the borders with zodiac and alchemy symbols on them. These symbols are a code for the numbers. (This code has to be deciphered to find the numbers for the objects.)
Once the correct order has been determined, the words are put into order accordingly, the two sections of the solution laid out on paper, and the spell is complete. (There are also blank spacings in the spell to make it easier to read. Blank panels found during stage 4 indicate these.) The detail of how the code of the tiles is deciphered is as follows.
There are four 'heraldic shield' clocks are set through the book with their hands pointing respectively to I o'clock, V o'clock, X o'clock, and L o'clock. (The incongruous 'L' should help indicate these clocks, their shields, and their 'time' has special meaning for the puzzle.)
The shields at the bottom of these 4 clocks each feature four heraldic devices quartered and jumbled together. So to complete any of these heraldic devices as an image would require all four clocks.


These devices are a sun, a dragon, a swan, and a helm. This means that a complete heraldic image device made up from all four clocks would represent IVXL.
Three of these shields, the dragon, the swan and the sun appear in complete form as individual shields elsewhere in the book, but are placed in meaningless locations as blind alleys.
However, the sun heraldic shield (IVXL) appears three times on a mounted Knight. The three shields therefore represent IVXL IVXL IVXL (Playroom text page.) He also gallops along flying a zodiac (Nimue) symbol on a red banner to indicate this number sequence should be matched to the twelve zodiac symbols. (Confirmed because the 'Nimue' symbol is master of all the zodiac symbols) The sun heraldic shield (IVXL) also appears three times on another mounted Knight. Again these three shields therefore represent IVXL IVXL IVXL (Playroom illustration page.) He gallops along flying an alchemy (Merlin) symbol on a green banner to indicate this number sequence should be matched to the twelve alchemy symbols.
(Confirmed because the 'Merlin' symbol is master of all the alchemy symbols)
So overall there are twenty-four symbols matched to the twenty-four roman numerals.
(12 Zodiac symbols first, 12 alchemy symbols second.)
I V X L I V X L I V X L I V X L I V X L I V X L
-------Zodiac symbols-------- -------Alchemy symbols-------
So each of the tiles represents either a roman numeral or is a fake tile meaning nothing. There are twenty-four 'genuine' tiles represented by the twelve zodiac symbols and the twelve alchemy symbols of the wand bracelet. The hierarchy of the zodiac and alchemy symbols is the same here as elsewhere. I.e.The zodiac order is the same as on the border panels, and the alchemy symbol hierarchy is the same as determined by the 'spitfire' riddle.
This sequence of symbols is now ready to be used as a code, and appear through the book as copper tiles around the sides and bottom of the pages. The 'nothing' or meaningless tiles are designed to separate the numbers. When the all the objects discovered in the book are renumbered and laid out according to this sequence, the alchemist's spell is revealed.
When the copper tiles symbols are translated into the roman numerals according to the above code breaker, they will give a sequence of three or four roman numbers, depending on how many word objects there are on a particular page. There are fake tiles that are easy to spot and have no significance as numbers, but are used to create the spacing between the roman numerals.
There are lots of confirmers and clues and links to help solving this puzzle, and making the connection between clocks, and therefore Roman numerals, and the knights and their zodiac / alchemy symbol pennants:
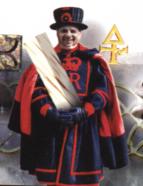
There are two Beefeaters holding large clocks on either side of a green door. (See Playroom page.) Marten and I posed for these photos. (No really we did!) Peter the goldsmith is the other beefeater!
These have the red and green pennants in their 'sky' panels, indicating their link with the zodiac symbols, alchemy symbols and the copper tiles. There are also two more clocks, one with the red pennant, and the other with the green pennant. These also show the relationship between the beefeaters and the zodiac and alchemy pennants, and also give an additional clue to the 'roman numerals' idea by being clocks. These two clocks also show the time as one o'clock, which is the starting point of applying the roman numbers to the objects found. Additionally these two clocks give another indication of their relationship to the objects found around the border panels, by having their bezels marked into forty-eight sections.
The principle that these two groups of symbols (zodiac and alchemy) are put together to make twenty-four symbols is indicated by both zodiac and alchemy pennant knights being identical in every respect except the colour of the pennants. It is also implicit in the entire story where Nimue and Merlin are drawn together, illuminated graphically by the transformation page where Nimue and Merlin transform, and the two wheels of zodiac symbols and alchemy symbols merge. Also the two beefeater clocks with the pennants are identical, and the same identical clocks are held by two beefeaters virtually side by side. (Playroom page).
Note: The correct method for reading of the tiles is also confirmed by a small device in the cave scene at top left made of tile material with symbols cut into it.

These means go anticlockwise when deciphering the tiles, and apply the numbers discovered in clockwise fashion to the objects found on the page. (Starting at the one o'clock position)
STEP SEVEN:
DIABOLO WOODEN 'SOLID':
(Mr Punch puzzle)
TURN PAGE TO THE
RIGHT
Solid connection:
The diabolo is gold-ring-linked to Mr Punch, and in turn Mr Punch
is gold-ring-linked to the "turn the page to the right" book.
Indicates that after the previous six steps have been completed, puzzlers must return to their previous start point page, turn to the double page to the right, and begin the seven-step sequence again.
This is indicated by a blank book with the right hand page curled over, meaning turn the page to the right. (This can be seen at the top of the 'marigolds' text page)
Note: The puzzle-box on the playroom page confirms how the puzzler must return to the level from which they started and only then use the diabolo. (i.e. turn the page). There is an explanation of this earlier on.
9.
Two
important symbols in the puzzle.
Nimue
& Merlin
Puzzlers figured these out successfully within a few weeks of
the book's release.

Nimue Merlin
THE ZODIAC 'DOUBLE MOON'
SYMBOL (NIMUE'S SYMBOL.)
This symbol floats in front of her on the metamorphosis page.
Nimue and her symbol are associated with the twelve zodiac symbols.
THE SUBLIMATE OF SULPHUR
SYMBOL (MERLIN'S SYMBOL)
Identified in the text on the 'wand' page as the master
symbol of all the gold alchemy symbols.
CONFIRMATION THAT NIMUE IS LINKED TO THE 'MASTER' ZODIAC SYMBOL
A key piece of information for solving the puzzle is that Nimue is synonymous with the zodiac, and Merlin is synonymous with the alchemy symbols. The 'transformation' page confirms this where the cat and owl transform into Nimue and Merlin. Surrounding Nimue is the zodiac (on an inner ring), and surrounding Merlin are alchemy symbols. There are many other confirmations for this all of which can also be found in the book.
Wherever there are actions involving the zodiac and alchemy symbols, the zodiac comes first and the alchemy symbols second. This is confirmed by the zodiac being to the left and alchemy symbols to the right on the transformation illustration page. This placement is almost also always reflected wherever the symbols appear in proximity. e.g. On the transformation text page, there is a witch hat to the left, and a wizard hat to the right.
This also confirms that Nimue is a witch, with a witch hat, information that proved useful to the puzzlers who came so very close to completely cracking the puzzle.
To even more firmly link the special 'Nimue' symbol with the zodiac, the symbol is virtually only ever found just beside or on the 'zodiac' panels, including on the wings of the butterfly on the Aries panel, the starting point of the zodiac. (Library illustration page.) The butterfly with the symbol on its wings is also seen on the clocks / transformation page, and is also floats over a special box embossed with a zodiac ring. This box also sits on an Aries panel on the transformation page. (Aries being the starting point for moving around the clockwise zodiac.)
This is also confirmed as Nimue's symbol because she has it floating above her hand in the transformation page, and it is on her cape brooch in the cave illustration. It is also on the witch clock, split into four pieces. (See the 'Stonehenge' text page.) The text identifies Nimue as a witch, and the zodiac butterfly is seen overlaid directly onto a witch hat. (On the wand dissolution page)
CONFIRMATION THAT MERLIN IS LINKED TO THE MASTER ALCHEMY SYMBOL
The 'alchemist's key' is a classic sublimate-of-sulphur symbol, and is also identified as the master of all the other alchemy symbols on the wand description page. This signals that the 'key' controls all aspects of their effects in the book. This is confirmed also by the symbol seen on the floor of the crypt. It is on a flagstone leading to Merlin's alchemy lab.
It is also confirmed as the wizard's (or Merlin's) symbol, because he has the 'alchemist's key' on his chest on the transformation page. It can be seen on his cape in the marigolds illustration, and also features on the cover of Merlin's spell book - which contains the spell of alchemy. It can be seen on the wizard Blaise's cloak in the Dark tower illustration. It is also repeated on the wizard Kell's cloak hood lining in the Stonehenge illustration. (The three wizards are all alchemists.)
There are also many other similar confirmers that can be found throughout the book.
10.
Tricky'muddlers'
hidden throughout the book.
The 'seven solids' or 'tumblers' are the main keys for solving the mystery, but there are also several other red herrings or 'muddlers' in the book as well to throw a few spanners in the works in case the 'seven solids' sub-puzzles were solved too quickly.
Even with the seven puzzles and the 3D lines method solved, the puzzle may still not work if the 'muddlers' are not properly accounted for. They are scattered variously throughout the book, at all seven stages and most of them are fairly simple.
Most of the muddlers are distractions rather than puzzles. An example is the picture of Merlin at the bottom left of the final Tintagel 'sea cave' page. Does he have an Alchemy symbol on his wizard's hat? Or not? Should it be counted into the mix? In fact it is just a shape made to look a bit like one. However, according to the puzzlers' calculations we saw on the main Merlin site and also on the puzzlers' own websites, they weren't fooled by this at all, and didn't count it anyway! There are also several others that we will leave you to find.
11.
'The Merlin
Mystery' puzzle nearly solved
before the
deadline - December 31st 2001.
Collectively the puzzlers came within a stone's throw of solving the mystery. It can also be revealed that the puzzlers solved all the seven sub-puzzles that lead to the solution.
The entire system for moving from level to level within the book was unravelled by the puzzlers. By using the 'seven solids' as guides, they discovered that the number of Zodiac panels and 'witch hats' on one level matched the number of alchemy symbols on another level, which also matched the number of 'number tiles' on yet another final level. But the key to finding the solution - drawing lines in 3D through these levels from the border panels to other panels to locate the 'object clue / words' - eluded everyone.
12.
Several
entries received with the final
'Peace'
word/symbol on the envelope

The
last word of the spell casting is 'peace'. This vital word required quite
a few clues to assemble it, and was also required to appear on the outside
of the entry envelopes. This allowed those envelopes to be given priority
when the mail was opened. Several envelopes with 'peace' symbols on the
outside were received. None of these entries had the right solution
however, although collectively some of the puzzlers came very close to
finding it.
13.
The
Magic of the Alchemist's Spell
Creating
the Pendragon Alchemy
The spell's runic-circle sequence spells out the journey a seeker must take to find their true purpose: "Ansuz, Laguz, Berkana, Jera, Kano, Raido, Uruz, Ehwaz, Thurisaz, Hagalaz, Dagaz, Fehu ... Mannaz."
This is the path from the old life to the new, changing from silver to gold ... a journey known as the Pendragon Alchemy. A burning silver candle symbolises the start of the path, and a gold candle burns to signify the end arrival point. Both are extinguished to signify the successful completion of the journey, and the transformation is symbolised by the fiery release of the Rosemary herb's fragrance.
The rune sequence is in the ancient form, and each has rich significance as a step on the journey of change. A dynamic, yet gentle and benevolent cycle.
The runic meanings as they
apply in the spell:
Ansuz - Initial creation , Laguz - Energy stream
begins, Berkana - Nurturing the energy, Jera - Cycle of change in motion,
Kano - The inner light ignites, Raido - Increasing movement, Uruz -
Release of creative power, Ehwaz - Communication with the new realm,
Thurisaz - Clearing away the past, Hagalaz - Liberation, Dagaz -
Transformation into the light, Fehu - Fulfilment of Creation, Mannaz -
Mystical, Universal Arrival."
Once the spell is truly cast the Pendragon Alchemy takes hold, and the spell-caster's dreams begin to unfold bringing peace to both them and world.
This is the spell Merlin
taught Arthur, who cast it to find his true purpose and create a shining
moment in history ... a magic realm where peace and justice ruled for
all. By contrast, the Dark Wizards
plotted to gain control of the wand, then manipulate its power to destroy
the realm and plunge the world into the darkness of their malevolent
rule.
View of Tintagel Head, Cornwall
Copyright photograph used with permission of www.tintagelweb.co.uk
14.
A
brief history of the book.
Jonathan Gunson tells of how the Merlin Mystery began, and of some
extrordinary experiences while creating the book.

Jonathan Gunson at Merlin's Cave,
Tintagel, Cornwall 1998.
(Publicity tour with the German media.)
In the summer of 1978 my wife and I stood in the great sea cave that runs beneath Tintagel Head in Cornwall. The cave runs right through the headland from one side to the other. The Cornish people call it Merlin's cave. The vast ruins of Castle Tintagel - fabled home of Arthur - towered overhead, and as the sound of the sea rolled by outside, it seemed to fill the cavern with whispering voices. At that moment, all of the magic my father had taught me took hold, and the idea for 'The Merlin Mystery' rushed into my mind, almost in its entirety.
What an idea! But life in New Zealand beckoned, and I knew I would be far too busy to tackle such a far-fetched project, so I put it away into the furthest recesses of my mind.
Seventeen years later, in the summer of 1995, I had been painting in my spare time, while working as an advertising designer. By then I had written and illustrated several books. I had also made television programmes, one of which was a 22 part series about Knights in space! But since the magical day in Merlin's Tintagel Cave I had not thought much again about 'The Mystery'. Then one night during a huge thunderstorm I awoke from a dream in which I was back at The Cave again - it must have been the sounds of the storm outside that woke me. I did not go back to sleep, but stood at a window for a while and watched the lightning display. From that moment I was completely overtaken by the compulsion to put the legend on paper.
My safe, secure advertising work was ditched, and I reached far back in time ...
... to that castle cave in Cornwall.
Merlin's
cave interior. Tintagel Cornwall.
Copyright
photograph used with permission of www.tintagelweb.co.uk
After the initial excitement of that decision, reality set in. The task of creating the story, puzzle, all the illustration and art work, let alone finding a publisher seemed daunting, so I approached my friend and fellow artist Marten Coombe with a questionable offer - would he throw aside his career and security to go on a madcap adventure about a wizard? I needn't have worried. Marten had a great sense of escapade, felt just as much at one with Celtic and English culture as I did, and loved the whole idea. So immediately we had the perfect team - both of us being artists and writers. We set up a small studio with an Apple MAC, lots of illustration programmes, and began.
Marten Coombe and I live in New Zealand, the most beautiful country in the world, a long stretch of ocean-locked islands, which seem to produce a disproportionate number of world figures such as Sir Edmund Hillary, the first man to climb Mount Everest. We also produced Lord Ernest Rutherford the scientist who split the atom, and the world's finest Soprano, Dame Kiri Te Kanawa. The Lord of The Rings movie trilogy has just been entirely filmed and produced in New Zealand by New Zealanders, led by the genius of New Zealand director producer Peter Jackson, and my own brother Timothy is one of the actors.
I hoped to make my own small contribution to our proud reputation with 'The Merlin Mystery', and took it to London with the initial story and test illustrations. I arrived there like Dick Whittington, expecting the streets to be paved with gold ... but they were not. It was wet, cold, stormy and expensive.
Then the sun came out from behind the clouds, and I met Jane Johnson, the editor at Harper Collins who, from the very moment she first saw the test sketches, instantly understood the idea behind The Merlin Mystery. Jane comes from Cornwall and is also the Tolkein editor, (now there is an idea!) and is deeply passionate about magical, legendary, literary ideas. I think she had planned to be the Tolkein editor since she was a child. She also written several successful legendary fantasy books of own - one of them with its dramatic finale also taking place at Tintagel. Jane sensed the power of The Pendragon Alchemy, the ethos driving The Merlin Mystery, and liked it very much.
From that day, the book had its publisher. I could not have asked for better.
The Pendragon Alchemy is the force unleashed when a person makes the decision to surrender to their true path, find and become the person they really are and follow their dream. Most people worry about how on earth to do this, after all, what about the mortgage, or earning enough to eat? Well, the Pendragon Alchemy can work for everyone - call it crossing the bridge into your own heart if you like. If you discover your true path, trust it, and head out along it, then at that moment, the universe will begin to fill in the details. All the things about which you dream will come to pass.
Now this is very difficult to
accomplish, and not many people do it completely. Merlin guided King
Arthur into almost entirely travelling the road of the Pendragon Alchemy.
Arthur became the powerful, just, widely acclaimed and loved King of his
people instead of the marauding, fame seeking dictator he had been. From
the moment he turned away for the direct pursuit of gold and power and
took to his 'path', a wonderful time in history arose. All the gold he had
attempted to forcefully wrest from its hiding place then flowed
effortlessly towards him to help him fulfil his real passionate mission -
a real future for his people - his inner dream.
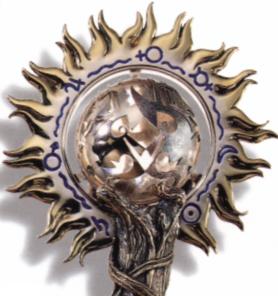
The Wand
Prize
What a wonderful opportunity... to create Merlin's Wand!
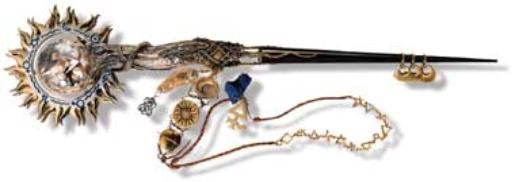
No-one had ever considered what Merlin's magical wand must have looked like. So we set out to change that forever. This was the central point of the story, Merlin's wand, all wrapped up with the Pendragon Alchemy, so it had to be truly fabulous. It was important to create a magical icon, with deep, genuine meaning that expressed the ethos of bringing peace to the world, with the power to create and maintain a magical realm for us all.
The Merlin Mystery tells how three wizards Kell, Blaise and Merlin created the wand over seven centuries, gradually adding their power to it. The imagery of the story is woven in precious metals right through the wand. Our goldsmith and wand-maker craftsman, Peter Wood, had his foundry and studio in a beautiful hand-built house on the wild west coast of New Zealand. Marten and I made scores of concept drawings, and rather pleased with ourselves took them to him for appraisal. But none met with his approval. GIVE ME A REAL IDEA he cried! One afternoon, while rather lost for inspiration, we were rambling in Auckland's huge 'Cornwall Park' and we found a fallen Oak branch. My grandfather had planted many trees there, and it seemed a good omen.
Back at the studio we began some new drawings based on the branch and the BIG IDEA then flowed across the page in a single afternoon. As soon as it was complete we knew we had cracked it. The magic shimmered back at us from the paper. We decided to open some champagne to celebrate, but champagne was far beyond our resources! So instead we went out to Peter's seaside foundry and drank tea with him on his veranda in the ocean breeze. He loved it and began work that same day. We took carefully modelled pieces to him over several months and he cast and assembled it all, including the really beautiful heavily gilded flame spell ring.

The gold alchemy
Symbols
The three Wizard'sSymbols
To create a really special object, we decided to use materials from all around the world. We had many friends seek out precious metals of various kinds, and an Afghani friend of mine went to Badakshan in the foothills of the Himalayas to find a perfect shard of blue Lapis Lazuli. Another artist glassblower, Chris Utton, made the glass vial in which the alchemist's seed gold is hoarded.
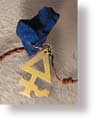
The shard of Lapis Lazuli, and the
Sublimate of Sulphur Symbol
The blue
glass enamelled flame ring
Another friend brought back the rutilated Crystal ball from Brazil. (It has fine golden threads running right through the crystal.)
The blue glass enamelled symbols and blue glass ring on the wand's flame head was done by other friends as a favour. The wand had to be placed in a special oven to set the blue enamel. We thought the entire wand might melt! All the while we furiously drew, painted sketched, and repaired our computer. I travelled to England and photographed a whole exhibition's worth of of statues and buildings in London, including the fa¡ade of the bank of England, the Peter Pan statue in Kensington Gardens and lots of other images.

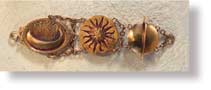
The 'chest of sanctuary'
Another artist and cabinet maker friend, Howard Neary helped build the 'chest of sanctuary' to store the wand, with beautiful medieval brass lettering "Merlinius est Mihi Dominus" ("Merlin is Master to me")
Jonathan setting the brass lettering into the
chest of sanctuary
Publishing day: Let the puzzlers
begin!
Two years later in 1997 we staggered across the finish line and sent the final artwork on CD ROM to Jane Johnson in London. The book was launched in 1998, and thereafter I was besieged with mail and phone calls, sometimes in the middle of the night. One man who phoned up at 3.00 am (he forgot the time difference between the hemispheres) was absolutely certain that the answer to the mystery was to phone the author! Another wrote to me telling how they had climbed up onto the giant frontage of Selfridges' store and examined the 'Queen of Time' statue for clues. (See the 'Faerie sprinkles spell dust' page)
The accumulating gold
prize

To make the 'alchemy' real, apart from the wand, a prize was offered that was built up by putting aside a small amount of money ('gold') in the Bank of England for each book sold.
The Governor, Eddie George was amused to take time off from keeping the British Pound stable to look at a story about alchemy - perhaps he thought I had the secret he needed! Mr George agreed to let us display the wand in the bank, and run the account for us. He was very kind. The prize ran up to seventy five thousand pounds. For the book we 'minted' a special coin - based on the great doors of the Bank of England. You can see it on the Alchemy lab pages.
The British World Wide Fund For Nature

It is wonderful to see the World Wide fund for Nature receive their windfall! The book is all about the power of the natural world so the prize has gone to a deserving home.
But equally, I do wish the puzzle had been solved by one of the thousands of people attempting it. They came so close. The puzzle is unravelled by solving the seven sub-puzzles which are represented in the book by the seven solids found in the opening library illustration. Many clues point to this, including the seven centuries mentioned in the book that it took to create the wand. We kept our eyes on many of the fan's web sites, and as the 2001 December 31st deadline approached, we could see that over 95% of the puzzle had been solved. In fact, all of the seven sub-puzzles had been solved, including how to use all the levels in the puzzle, and the fact there were 75 'somethings' to find!
Puzzler's web sites
During the three years of the contest Marten and I often looked at many of the internet web sites and bulletin boards set up by puzzlers, and were often staggered by the brilliance of the work there. Some of the sheer dogged determination was also remarkable. Sub-puzzles we had thought presented almost impenetrable walls were were stormed by the 'knights of the web' within a few months!
The wild ride!
My experience with 'The Mystery' has been extraordinary during its six year span. Since the moment in early 1995 I plucked up the courage to proceed, time has almost seemed to stand still. I have received many thousands of wonderful communications from people in every part of the world.
A sadness for me I had not foreseen is that the rules prevented me from replying to all those kind sentiments - especially those who met, fell in love and married through their interest in 'The Mystery'! I obeyed the rules most of the time although occasionally I did sneak across the divide to wish people the very best for their birthday, or when someone had sadness in their lives, I let them know that the Pendragon Alchemy was always there waiting to guide them. As time went by, I also saw a new phenomenon, something I had never experienced in my entire lifetime; A kind of super-consciousness arose amongst the puzzlers - an extraordinary collective form of thinking made up of many, many minds acting in unison. I think we are seeing a new type of force in the world - it is very liberating.
A sequel?
I have been frequently... no, endlessly asked about a sequel, but ..... I think Merlin and Nimue should continue to meet, whisper and laugh as lovers for a quite while longer while the sea ebbs and flows beneath Tintagel's walls. We shall see ...
May the Pendragon Alchemy be with you.
Jonathan Gunson
January 1st 2002
Text
?copyright
Jonathan Gunson 2002
Special
thanks to David Flower, webmaster http://www.tintagelweb.co.uk/ for
use of the Tintagel photographs on this website.
Copyright
photographs used with permission of http://www.tintagelweb.co.uk/